

지난 10월 HashiCorp가 Waypoint라는 새 오픈소스 제품을 발표했다. HashiCorp는 Vagrant, Packer, Terraform, Consul, Vault, Nomad 6개의 제품군으로 오랫동안 유지하고 있었는데(중간에 없어진 제품도 있지만...) 오랜만에 Boundary와 함께 새로 공개한 제품이다.
홈페이지 설명에 따르면 Waypoint는 하나의 설정 파일로 Kubernetes, Nomad, EC2, Google Could Run 등의 플랫폼에서 빌드, 배포, 릴리스의 워크플로우를 관리하고 모니터링한다고 나와 있다.
설치
설치 문서를 보면 macOS 기준으로는 brew를 이용해서 설치할 수 있다고 나오지만 나는 Binary로 설치하는 걸 더 선호하기 때문에 직접 다운로드받아서 PATH에 넣었다.(이 글을 쓰는 시점의 최신 버전은 0.2.0이다.)
$ waypoint version
Waypoint v0.2.0 (360b2b3a)
버전에서 보듯이 프로젝트 초창기이기 때문에 이후 버전이 올라가면서 이글에서 설명하는 많은 기능이 달라질 수 있다.
$ waypoint
Welcome to Waypoint
Docs: https://waypointproject.io
Version: v0.2.0

Usage: waypoint [-version] [-help] [-autocomplete-(un)install] <command> [args]

Common commands
  build        Build a new versioned artifact from source
  deploy       Deploy a pushed artifact
  release      Release a deployment
  up           Perform the build, deploy, and release steps for the app

Other commands
  artifact        Artifact and build management
  config          Application configuration management
  context         Server access configurations
  deployment      Deployment creation and management
  destroy         Delete all the resources created for an app
  docs            Show documentation for components
  exec            Execute a command in the context of a running application instance
  hostname        Application URLs
  init            Initialize and validate a project
  install         Install the Waypoint server to Kubernetes, Nomad, or Docker
  logs            Show log output from the current application deployment
  runner          Runner management
  server          Server management
  token           Authenticate and invite collaborators
  ui              Open the web UI
  version         Prints the version of this Waypoint CLI
Waypoint 서버
Waypoint를 사용하려면 Kubernetes 클러스터 같은 대상 환경에 Waypoint 서버가 설치되어 있어야 한다. 서버가 필요한 HashiCorp 제품이 그렇듯이 waypoint가 서버이자 클라이언트로 동작한다.
공식 튜토리얼 문서에 나와 있는 대로 동작을 이해하기 위해 일단 Docker Desktop을 이용해 보자.
waypoint install 명령어로 기존 사용 중인 플랫폼에 서버를 설치할 수 있는데 CLI 도움말을 보면 현재 지원하는 플랫폼은 Kubernetes, Nomad, Docker로 보인다. -accept-tos 플래그는 Waypoint URL 서비스를 사용할 때 필요한 이용약관과 개인정보 이용에 동의하기 위해서 필요하다. 여기서 Waypoint URL 서비스는 HashiCorp에서 운영하는 서비스이다. 아래에서 나오겠지만 배포 후 미리 보기 URL 등이 나오는데 이 URL이 로컬에서만 사용하는 것이 아니라 Waypoint URL 서비스에 등록되어서 관리되는 것이다.(다시 말하면 이 서비스가 죽으면 미리 보기 URL 같은 건 사용할 수 없다.) 이 엔드포인트를 안 쓸 수도 있는데 일단 여기서는 튜토리얼을 따라했다.
$ waypoint install -platform=docker -accept-tos
✓ Pulling image: hashicorp/waypoint:latest
✓ Installing Waypoint server to docker
✓ Server container started!
✓ Configuring server...
Waypoint server successfully installed and configured!

The CLI has been configured to connect to the server automatically. This
connection information is saved in the CLI context named "install-1609178181".
Use the "waypoint context" CLI to manage CLI contexts.

The server has been configured to advertise the following address for
entrypoint communications. This must be a reachable address for all your
deployments. If this is incorrect, manually set it using the CLI command
"waypoint server config-set".

Advertise Address: waypoint-server:9701
Web UI Address: https://localhost:9702
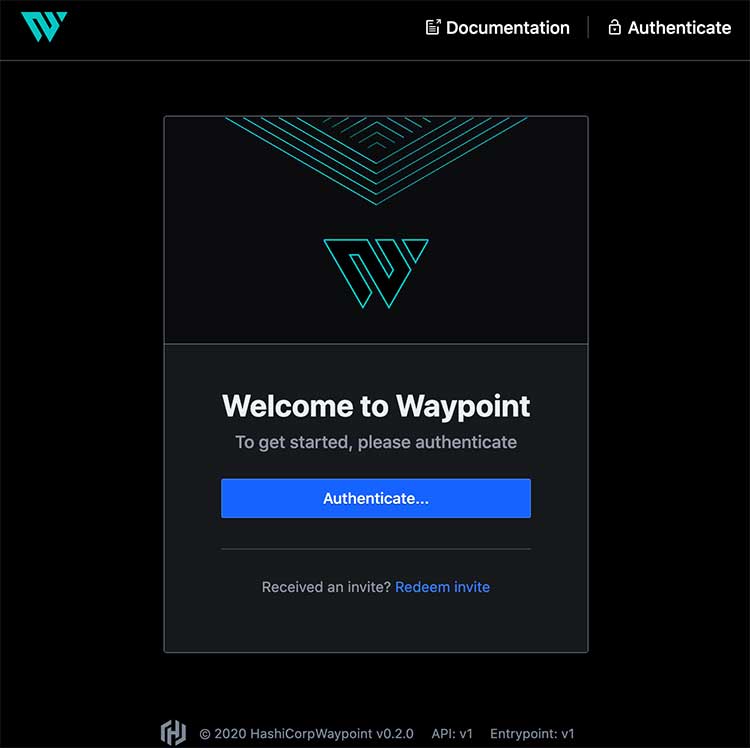
Waypoint 도커 이미지를 받아서 설치한 뒤에 컨테이너를 실행하므로 서버가 실행되었다는 메시지가 나온다. 위에 나온 Web UI 주소 https://localhost:9702에 접속하면 다음과 같은 화면을 볼 수 있다.
"Authenticate"를 누르면 토큰 발급 방법이 나온다.
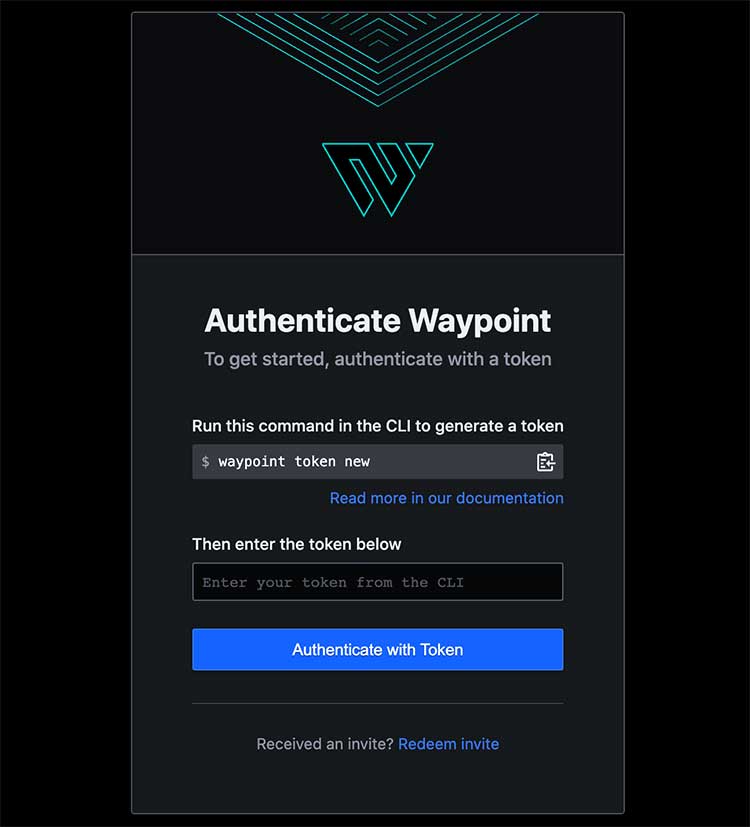
$ waypoint token new
bM152PWkXxfoy4vA51JFhR7Lq8oLRGHzzAL9U...#뒷부분 생략
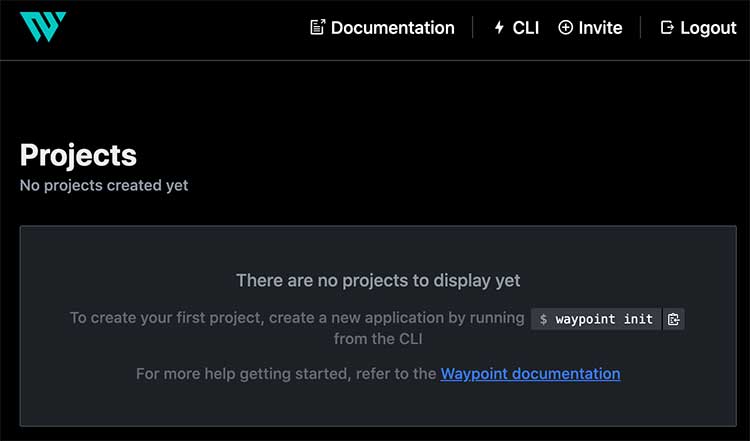
해당 토큰으로 로그인하면 아직 배포된 프로젝트가 없다고 나온다.
Waypoint 프로젝트 설정
로컬에서 사용하는 waypoint 클라이언트가 서버와 연결해서 워크플로우를 초기화하는데 이때 runner로 등록되어서 runner에서 빌드해서 배포할 수 있다.
waypoint-examples 저장소에 다양한 docker 예시 애플리케이션이 있다. 애플리케이션의 내용을 여기서 크게 중요하지 않음으로 그냥 Node.js 웹 애플리케이션이라고만 하겠다. 해당 저장소에서 waypoint init으로 초기화하면 설정 파일을 생성할 수 있다.
$ waypoint init
Initial Waypoint configuration created!
No Waypoint configuration was found in this directory.

A sample configuration has been created in the file "waypoint.hcl". This
file is heavily commented to help you get started.

Once you've setup your initial configuration, run "waypoint init" again to
validate the configuration and initialize your project.
프로젝트 루트에 waypoint.hcl이 생기는데 이 파일을 열어보면 아래와 같다.
# The name of your project. A project typically maps 1:1 to a VCS repository.
# This name must be unique for your Waypoint server. If you're running in
# local mode, this must be unique to your machine.
project = "my-project"

# Labels can be specified for organizational purposes.
# labels = { "foo" = "bar" }

# An application to deploy.
app "web" {
    # Build specifies how an application should be deployed. In this case,
    # we'll build using a Dockerfile and keeping it in a local registry.
    build {
        use "docker" {}

        # Uncomment below to use a remote docker registry to push your built images.
        #
        # registry {
        #   use "docker" {
        #     image = "registry.example.com/image"
        #     tag   = "latest"
        #   }
        # }

    }

    # Deploy to Docker
    deploy {
        use "docker" {}
    }
}
설정이 복잡하진 않아서 대충 이해할 수 있다. 프로젝트에 앱이 있는 구조고 여기서는 build와 deploy만 정의했지만 release도 있다. use에서 플러그인을 사용하고 원하는 설정을 넣을 수 있다. 결국, 이 파일 하나에서 어떤 게 빌드, 배포, 릴리스하는지를 선언해 놓고 사용하겠다는 의미이다. waypoint.hcl 정의에 대한 내용은 문서에서 확인할 수 있다.
요즘이야 Docker를 보통 사용하겠지만 이 예제에서는 그냥 express 앱이라서 Dockerfile은 생성하지 않았으므로 위의 build 부분을 다음과 같이 변경했다.
build {
        use "pack" {}
    }
이 설정은 빌드할 때 Heroku의 Buildpacks를 사용한다는 의미이다. use "docker" {}로 되어 있으면 Docker 빌드를 시도한다.
Waypoint 배포
설정이 완료되면 그냥 waypoint up을 실행하면 빌드 후 배포까지 할 수 있다.
$ waypoint up
» Building...
Creating new buildpack-based image using builder: heroku/buildpacks:18
✓ Creating pack client
✓ Building image
│ [exporter] Adding 1/1 app layer(s)
│ [exporter] Adding layer 'launcher'
│ [exporter] Adding layer 'config'
│ [exporter] Adding label 'io.buildpacks.lifecycle.metadata'
│ [exporter] Adding label 'io.buildpacks.build.metadata'
│ [exporter] Adding label 'io.buildpacks.project.metadata'
│ [exporter] *** Images (9116416a95ff):
│ [exporter] index.docker.io/library/web:latest
│ [exporter] Adding cache layer 'heroku/nodejs-engine:nodejs'
│ [exporter] Adding cache layer 'heroku/nodejs-engine:toolbox'
✓ Injecting entrypoint binary to image
Generated new Docker image: web:latest
» Deploying...
✓ Setting up waypoint network
✓ Starting container
✓ App deployed as container: web-01ETN9RGYVA7480EDCRNTK3D9Y
» Releasing...
The deploy was successful! A Waypoint deployment URL is shown below. This
can be used internally to check your deployment and is not meant for external
traffic. You can manage this hostname using "waypoint hostname."
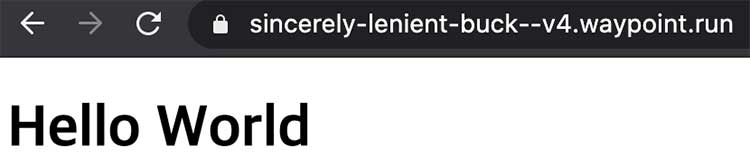
URL: https://sincerely-lenient-buck.waypoint.run
Deployment URL: https://sincerely-lenient-buck--v1.waypoint.run
로그에서 보듯이 buildpacks로 빌드 후에 컨테이너로 배포한 것을 볼 수 있다. 그리고 자동으로 릴리스 URL과 배포별 미리 보기 URL을 만들어 준다. 제공된 URL에 접속하면 서버가 잘 떠 있는 것을 볼 수 있다. 위에서 URL은 릴리스 URL이라 해당 릴리스에서 공통으로 사용되는 URL이고 Deployment URL은 배포할 때마다 버전이 올라가면서 바뀌게 된다.
설정된 호스트네임은 waypoint hostname list로 볼 수 있다.
$ waypoint hostname list
         HOSTNAME        |                FQDN                 |                                                         LABELS
-------------------------+-------------------------------------+---------------------------------------------------------------
  sincerely-lenient-buck | sincerely-lenient-buck.waypoint.run | map[waypoint.hashicorp.com/app:webwaypoint.hashicorp.com/project:my-project waypoint.hashicorp.com/workspace:default]
많은 설정을 하지 않았음에도 서버를 띄웠다. 더 봐야겠지만 사용은 꽤 쉬워 보인다. 어드민 UI를 더 살펴보자.
배포했으니 아까와 달리 프로젝트가 등록된 것을 볼 수 있다.
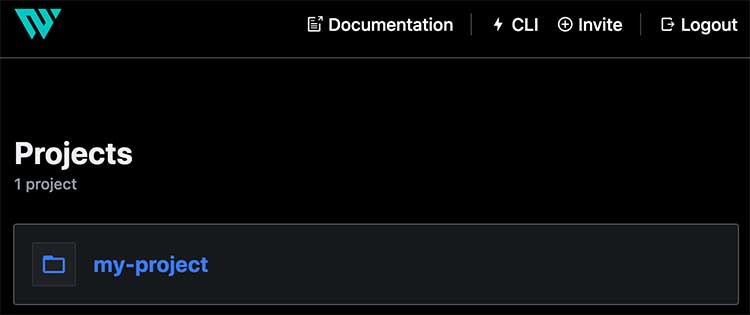
프로젝트 내에 앱이 있는 구조이다. 여기선 앱이 하나뿐이지만 구조상 한 프로젝트에 여러 앱을 등록할 수 있는 것으로 보인다.
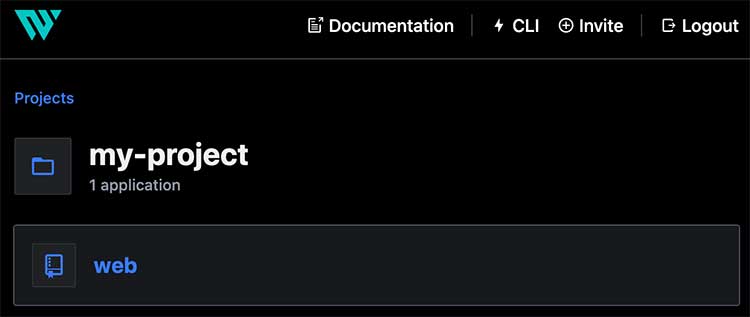
앱을 누르면 빌드, 배포, 릴리스를 모두 여기서 볼 수 있다. 아래에서 보듯이 애플리케이션의 로그뿐 아니라 각 빌드 히스토리와 빌드 로그, 배포 히스토리, 릴리스 히스토리를 볼 수 있다. 이전 Deployment를 UI에서 다시 배포할 수도 있다.

그 외 명령어
waypoint exec를 사용하면 최근 배포에 명령어를 실행할 수 있다. 그래서 /bin/bash를 실행하면 아래처럼 컨테이너에 접속할 수 있다.(Buildpacks로 빌드해서 그런지 호스트 명이 heroku다.)
$ waypoint exec /bin/bash
Connected to deployment v4
heroku@57a91816b4ac:/$
웹 UI에 들어가지 않아도 waypoint logs로 애플리케이션 로그를 볼 수 있다.
$ waypoint logs
2020-12-28T19:07:27.463Z PB34SW: [INFO]  entrypoint: entrypoint starting: deployment_id=01ETNBZ0XK8Y0MWK2E616CWYCB
instance_id=01ETNBZ1SQKKR9KJ28KDPB34SW args=[/cnb/lifecycle/launcher]
2020-12-28T19:07:27.463Z PB34SW: [INFO]  entrypoint: entrypoint version: full_string="Waypoint v0.2.0" version=v0.2.0
prerelease= metadata= revision=
2020-12-28T19:07:27.463Z PB34SW: [INFO]  entrypoint: server version info: version=v0.2.0 api_min=1 api_current=1
entrypoint_min=1 entrypoint_current=1
2020-12-28T19:07:28.127Z PB34SW: [INFO]  entrypoint.config.watcher: env vars changed, sending new child command
2020-12-28T19:07:28.127Z PB34SW: [INFO]  entrypoint.child: starting child process: args=[/cnb/lifecycle/launcher]
cmd=/cnb/lifecycle/launcher
2020-12-28T19:07:28.441Z PB34SW:
2020-12-28T19:07:28.441Z PB34SW: > node-js-getting-started@0.3.0 start /workspace
2020-12-28T19:07:28.441Z PB34SW: > node index.js
2020-12-28T19:07:28.441Z PB34SW:
2020-12-28T19:07:28.592Z PB34SW: Listening on 3000
테스트가 끝났으니 waypoint destroy로 릴리스와 배포를 삭제한다.(이렇게 해도 프로젝트까지 없어지진 않는데 이건 어디서 지우는지 아직 모르겠다.)
$ waypoint destroy

» Destroying releases for application 'web'...

» Destroying deployments for application 'web'...
Destroy successful!
다양하게 써봐야겠지만 어느 정도 개념은 이해했고 서버에 waypoint를 설치해야 하지만 사용은 꽤 편해 보인다. 물론 UI가 이쁜 것도 맘에 든다. 아직 0.2.0이라서 본격적으로 쓰기는 이르지만 계속 좀 살펴볼 예정이다.

Comments