
설치는 간단한데 Play사이트에서 최신버전을 다운로드 받습니다.(현재 버전은 1.0.3.2입니다) 다운받은 파일의 압축을 풀어서 원하는 곳에 복사해 놓은 뒤에 play의 폴더를 path로 설정합니다.
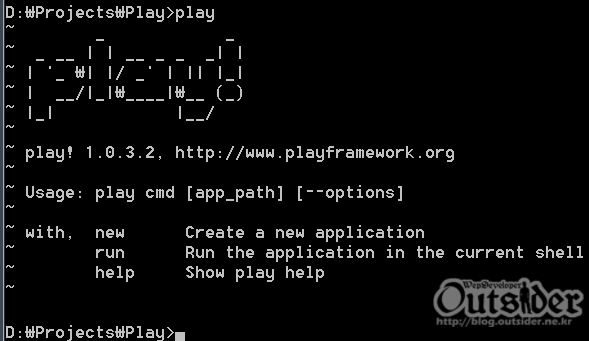
path설정후 터미널에서 play를 입력하면 위와같이 play로고가 나타나면 정상적으로 설치된 것입니다. 위 화면에서 나타나는 것처럼 play에는 커맨드 명령어가 존재합니다.
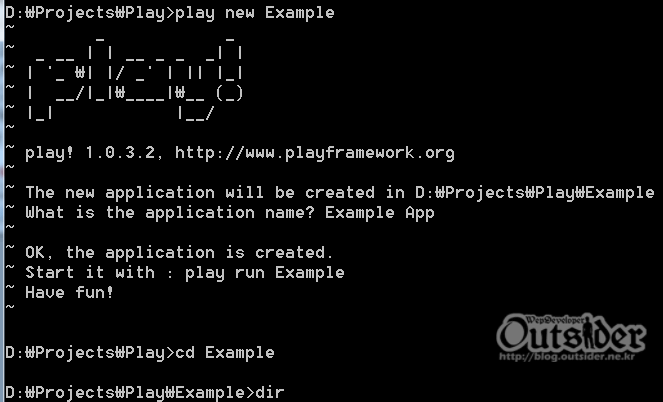
play new [프로젝트명] 을 입력하면 자동으로 paly프로젝트폴더와 기본적인 파일들이 생성됩니다. play프로젝트에 기본적으로 생기는 폴더구조는 아래와 같습니다.
- app/ - 애플리케이션 코어파일들이 위치하는 폴더로 controllers, models, views 3개의 폴더가 존재하면 .java 소스파일이 위치하는 폴더입니다.
- conf/ - 애플리케이션의 설정파일들이 위치합니다. 메인설정파일인 application.conf파일과 URI패턴을 코드에 매핑하는 routes파일등이 존재합니다.
- lib/ - 추가적인 .jar같은 Java 라이브러리 팩키지들이 위치할 폴더입니다.
- public/ - javascript, css, images같은 리소스파일들이 위치하는 폴더입니다.
- test/ - JUnit이나 Selenium 테스트로 작성된 테스트 코드가 존재하는 폴더입니다.
play는 기본적으로 UTF-8을 사용하기 때문에 작성하는 파일들의 인코딩도 UTF-8에 맞추어 주어야 합니다.
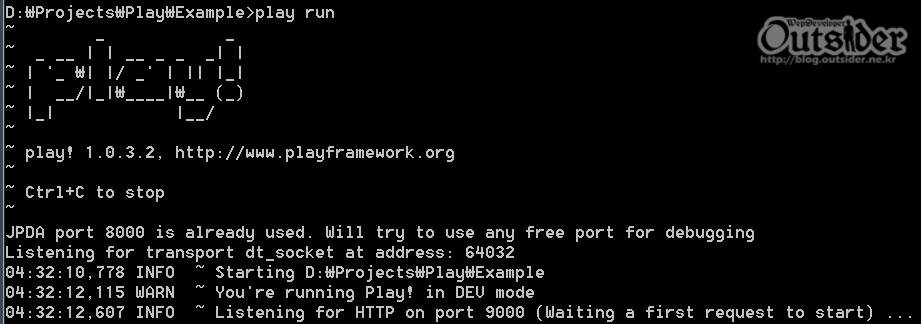
위에서 생성한 play 프로젝트 폴더 안에서 play run 을 실행하면 위처럼 play가 실행되며 기본포트은 9000번 포트로 대기상태가 됩니다.
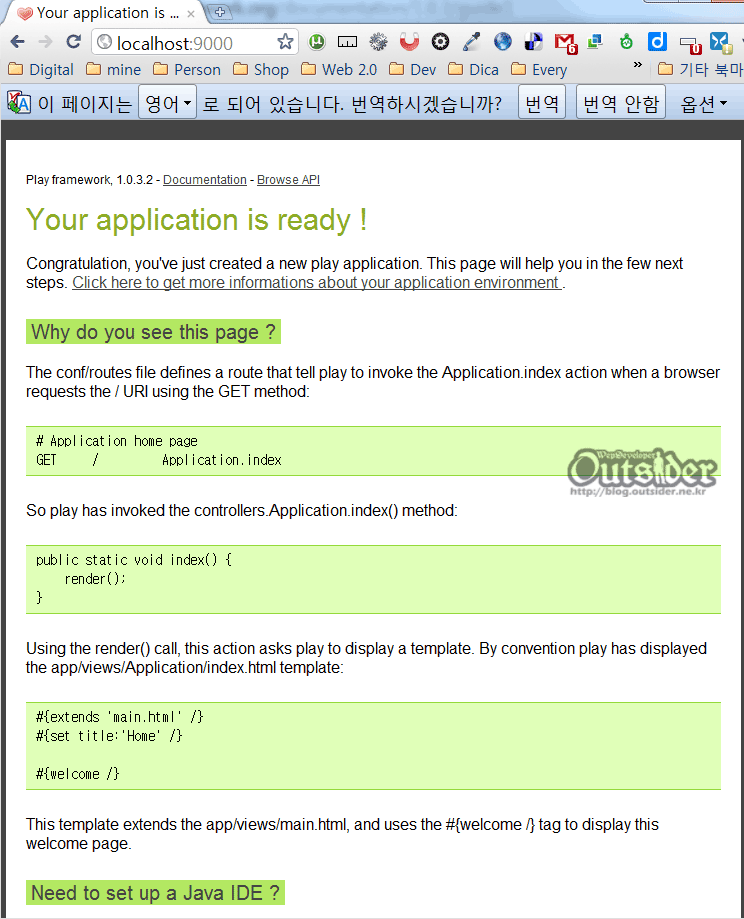
이제 웹브라우저에서 http://localhost:9000 으로 접속을 하면 위처럼 play의 기본웹사이트가 나타나며 여러가지 추가설정에 대한 안내가 나타납니다.
# Home page
GET     /                                       Application.index
conf\routes 을 열어보면 위와같이 설정이 되어 있습니다. GET으로 / 에 대해서 요청이 오면 Application.index가 호출되도록 설정 된 것이며 Application.index는 controllers.Application.index를 가르키고 있습니다. 이 호출은 app\controllers\Application.java파일의 index() 메서드를 가르키며 기본적으로 index()는 아래와 같이 정의되어 있습니다.
public class Application extends Controller {

    public static void index() {
        render();
    }
}
index()메서드는 static으로 선언되어 있으며 render()를 호출하면 Play가 HTTP response를 렌더링합니다. 별도의 파일을 지정하지 않았기 때문에 app\views\Application\index.html 파일을 사용해서 렌더링합니다.
#{extends 'main.html' /}
#{set title:'Home' /}

#{welcome /}
index.html파일은 위처럼 간단히 정의되어 있습니다. #{welcome /}는 위에서 본 기본적인 Play 애플리케이션의 화면을 렌더링 하는 태그입니다. #{extends 'main.html'/} 태그는 다른 템플릿파일을 상속받도록 지정하는 역할을 하며 여기서는 app\views\main.html 파일을 템플릿 파일로 지정하고 title변수에 Home라는 문자열을 지정하였습니다.
<!DOCTYPE html>

<html>
    <head>
        <title>#{get 'title' /}</title>
        <meta http-equiv="Content-Type" content="text/html; charset=utf-8">
        <link rel="stylesheet" type="text/css" media="screen" href="@{'/public/stylesheets/main.css'}">
        #{get 'moreStyles' /}
        <link rel="shortcut icon" type="image/png" href="@{'/public/images/favicon.png'}">
        <script src="@{'/public/javascripts/jquery-1.4.2.min.js'}" type="text/javascript" charset="utf-8"></script>
        #{get 'moreScripts' /}
    </head>
    <body>
        #{doLayout /}
    </body>
</html>
main.html파일은 위처럼 지정되어 있습니다. title의 값을 가져와서 <title>에 지정하며 #{doLayout /}부분에 index.html파일의 내용이 들어가게 됩니다.
// Application.java
public static void index() {
    String greeting = "Hello World";
    render(greeting);
}
Application.java에서 문자열을 만들어서 render()에 파라미터로 넘겨줍니다.
<!-- index.html -->
#{extends 'main.html' /}
#{set title:'Home' /}

<h1>${greeting}</h1>
이제 뷰파일인 index.html에서 ${greeting} 태그를 사용해서 컨트롤러에서 정의한 greeting 변수를 찍어줍니다.
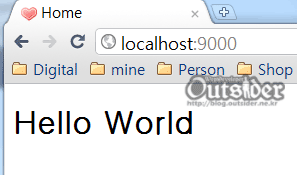
Play에서는 자바소스를 변경하여도 재기동할 필요가 없기 때문에 웹브라우저에서 새로고침만 해주면 위와 같이 Hello World가 찍히는 것을 볼 수 있습니다.


Comments