

Hylyard로 Spinnaker를 Kubernetes에 설치하기
전에 CD(Continuous Delivery) 도구인 Spinnaker를 테스트해 보려고 Docker for Mac에서 kubernetes를 사용해 봤는데 본격적으로 사용해 보려고 하니 클라우드에서 테스트를 해보고 싶었다. 이전에는 Spinnaker가 목적이 아니라 Chaos Monkey가 목적이라서 로컬에서 테스트했지만, Spinnaker 자체를 보려고 하니 실제 프로덕션에서는 어떻게 동작하는 지도 관심이 갔다.
처음에는 데모/평가용 설치를 해보려고 했지만 Google Cloud Launcher로 실행해 보려고 했지만, GCP를 잘 몰라서 그런지 제대로 실행 안 되는 문제를 도저히 해결할 수 없어서 실제 프로덕션 환경과 똑같이 설치하는 쪽으로 넘어갔다.
Spinnaker 관리 도구 Halyard 설치하기
Spinnaker를 프로덕션 환경에서 설치하려면 Spinnaker를 관리하는 Halyard라는 도구를 설치해야 한다. 문서에 따르면 로컬에 설치하거나 Docker를 이용해서 사용할 수 있는 것 같은데 Docker를 이용하면 생각지 못한 문제를 겪을 것 같아서 나는 로컬에 직접 Halyard를 설치했다. 참고로 Halyard는 Linux와 macOS에만 설치 가능한 것으로 보인다.
먼저 Hylyard 설치 스크립트를 다운 받는다.
1$ curl -O https://raw.githubusercontent.com/spinnaker/halyard/master/install/macos/InstallHalyard.sh
2  % Total    % Received % Xferd  Average Speed   Time    Time     Time  Current
3                                 Dload  Upload   Total   Spent    Left  Speed
4100  4420  100  4420    0     0  11282      0 --:--:-- --:--:-- --:--:-- 11304
다운받은 스크립트를 실행한다. 참고로 Hylyard를 설치하려면 Java 8 이상이 필요하고 설치되어 있지 않다면 Java >=8 not yet installed - please install java >=8. 오류가 발생한다.
 1$ $ sudo bash InstallHalyard.sh
 2Halyard version will be stable
 3Halconfig will be stored at /Users/jeonghunbyeon/.hal/config
 4Uninstall script is located at /Users/jeonghunbyeon/.hal/uninstall.sh
 5Java is already installed & at the right version
 6~/bin/installhalyard.fbmx ~/bin
 7  % Total    % Received % Xferd  Average Speed   Time    Time     Time  Current
 8                                 Dload  Upload   Total   Spent    Left  Speed
 9100  186M  100  186M    0     0  19.7M      0  0:00:09  0:00:09 --:--:-- 19.8M
10x halyard/
11x halyard/config/
12x halyard/config/halyard.yml
13x halyard/lib/
14x halyard/lib/aws-java-sdk-lex-1.11.251.jar
15... 중략 ...
16x halyard/bin/hal.bat
17x halyard/bin/halyard.bat
18x halyard/bin/hal
19x halyard/bin/halyard
20x hal
21x update-halyard
22~/bin
23The halyard daemon isn't running yet... starting it manually...
241.6.0-20180806143444
제대로 설치되었는지 다음 명령어로 확인해 볼 수 있다.
1$ hal -v
21.6.0-20180806143444
GKE에 Spinnaker 설치하기
Halyard가 Spinnaker의 생명주기를 관리해 주기 때문에 다양한 환경에 설치할 수 있다.(Spinnaker가 Kubernetes에 맞춰진 도구는 아니다.) 문서를 보면 EKS, GKE 뿐만 아니라 DC/OS, Google App Engine, AWS 등 다양한 환경에 설치할 수 있고 나 같은 경우는 Kubernetes와 사용해 보려는 것이 목적이었기 때문에 Kubernetes Provider V2 (Manifest Based)를 선택했다. 어차피 Kubernetes와 연동해서 사용하면 Kubernetes가 어디에 설치되어 있는가는 큰 상관이 없으므로 AWS EKS나 Google GKE인가에 상관없이 "Kubernetes (legacy provider)"와 "Kubernetes Provider V2 (Manifest Based)"로만 나뉘게 된다.
Spinnaker를 Kubernests와 함께 사용할 만한지 확인해 보려는 게 목적이었으므로 GKE에 Kubernetes 클러스터를 생성하고 Spinnaker 설치에 들어갔다.
설치한 GKE 클러스터를 kubectl이 컨텍스트로 사용하도록 gcloud로 인증정보를 가져온다.
1$ gcloud container clusters get-credentials spinnaker-test
2Fetching cluster endpoint and auth data.
3kubeconfig entry generated for spinnaker-test.
kubectl로 확인해도 같은 컨텍스트를 보고 있는 걸 알 수 있다.
1$ kubectl config get-contexts
2CURRENT   NAME                                                 CLUSTER                                              AUTHINFO                                             NAMESPACE
3          docker-for-desktop                                   docker-for-desktop-cluster                           docker-for-desktop
4*         gke_devenv-205606_asia-northeast1-a_spinnaker-test   gke_devenv-205606_asia-northeast1-a_spinnaker-test   gke_devenv-205606_asia-northeast1-a_spinnaker-test
5          tf_gke_devenv-205606_asia-northeast1-a_sebak-test    tf_gke_devenv-205606_asia-northeast1-a_sebak-test    tf_gke_devenv-205606_asia-northeast1-a_sebak-test
이후 설치 과정을 따라가다 보니 spinnaker라는 네임스페이스를 사용하는 것 같아서 네임스페이스를 새로 생성했다. 이는 실제로 운영하면서 다시 확인해 봐야 한다. 네임스페이스를 만들려고 ns.json 파일을 다음과 같이 만든다.
 1{
 2  "kind": "Namespace",
 3  "apiVersion": "v1",
 4  "metadata": {
 5    "name": "spinnaker",
 6    "labels": {
 7      "name": "spinnaker"
 8    }
 9  }
10}
정의한 네임스페이스를 Kubernetes에 생성한다.
1$ kubectl create -f ns.json
2namespace "spinnaker" created
Kubernetes 프로바이더를 활성화한다.
 1$ hal config provider kubernetes enable
 2The halyard daemon isn't running yet... starting it manually...
 3+ Get current deployment
 4  Success
 5WARNING: An illegal reflective access operation has occurred
 6WARNING: Illegal reflective access by com.fasterxml.jackson.databind.util.ClassUtil (file:/opt/halyard/lib/jackson-databind-2.8.8.jar) to constructor java.lang.Void()
 7WARNING: Please consider reporting this to the maintainers of com.fasterxml.jackson.databind.util.ClassUtil
 8WARNING: Use --illegal-access=warn to enable warnings of further illegal reflective access operations
 9WARNING: All illegal access operations will be denied in a future release
10+ Edit the kubernetes provider
11  Success
12+ Successfully enabled kubernetes
k8s-account라는 이름으로 어카운트를 설정한다.
 1$ hal config provider kubernetes account add k8s-account \
 2     --provider-version v2 \
 3     --context $(kubectl config current-context)
 4+ Get current deployment
 5  Success
 6WARNING: An illegal reflective access operation has occurred
 7WARNING: Illegal reflective access by com.fasterxml.jackson.databind.util.ClassUtil (file:/opt/halyard/lib/jackson-databind-2.8.8.jar) to constructor java.lang.Void()
 8WARNING: Please consider reporting this to the maintainers of com.fasterxml.jackson.databind.util.ClassUtil
 9WARNING: Use --illegal-access=warn to enable warnings of further illegal reflective access operations
10WARNING: All illegal access operations will be denied in a future release
11+ Add the k8s-account account
12  Success
13+ Successfully added account k8s-account for provider
14  kubernetes.
아티팩트를 활성화한다.
1$ hal config features edit --artifacts true
2+ Get current deployment
3  Success
4+ Get features
5  Success
6- No changes supplied.
이제 환경을 선택하라고 나오는데 환경으로는 "Distributed installation", "Local installations", "Local git installations"가 있다. 나같은 경우는 Kubernetes에 설치할 것이므로 "Distributed installation"를 선택했다. 환경설정을 위해 ACCOUNT 환경변수를 설정하고 아래 명령어를 실행한다.
 1$ ACCOUNT=k8s-account
 2
 3$  hal config deploy edit --type distributed --account-name $ACCOUNT
 4+ Get current deployment
 5  Success
 6+ Get the deployment environment
 7  Success
 8WARNING: An illegal reflective access operation has occurred
 9WARNING: Illegal reflective access by com.fasterxml.jackson.databind.util.ClassUtil (file:/opt/halyard/lib/jackson-databind-2.8.8.jar) to constructor java.lang.Void()
10WARNING: Please consider reporting this to the maintainers of com.fasterxml.jackson.databind.util.ClassUtil
11WARNING: Use --illegal-access=warn to enable warnings of further illegal reflective access operations
12WARNING: All illegal access operations will be denied in a future release
13+ Edit the deployment environment
14  Success
15+ Successfully updated your deployment environment.
다음은 Spinnaker의 설정 등을 관리할 스토리지를 설정해 주어야 한다. AWS S3, Redis, Google Cloud Storage(GCS) 등을 선택할 수 있는데 어차피 GKE로 설정하고 있으므로 GCS를 선택했다.
GCS 스토리지를 설정한다.
 1$ PROJECT=$(gcloud info --format='value(config.project)')
 2$ BUCKET_LOCATION=asia
 3$ SERVICE_ACCOUNT_DEST=/Users/jeonghunbyeon/boscoin/infrastructure/gcp/test2-env/credentials.json
 4
 5$ hal config storage gcs edit --project $PROJECT \
 6    --bucket-location $BUCKET_LOCATION \
 7    --json-path $SERVICE_ACCOUNT_DEST
 8+ Get current deployment
 9  Success
10+ Get persistent store
11  Success
12- No changes supplied.
스토리지 소스를 GCS로 지정한다.
1$ hal config storage edit --type gcs
2+ Get current deployment
3  Success
4+ Get persistent storage settings
5  Success
6- No changes supplied.
이제 설정이 끝났으니 정말 Spinnaker를 배포할 차례이다. 다음 명령어로 배포할 Spinnaker 버전을 확인할 수 있다.
 1$ hal version list
 2+ Get current deployment
 3  Success
 4+ Get Spinnaker version
 5  Success
 6+ Get released versions
 7  Success
 8+ You are on version "1.8.5", and the following are available:
 9 - 1.6.2 (GLOW):
10   Changelog: https://gist.github.com/spinnaker-release/3fc52e64bae26f8ea1c68bcd8383d4b5
11   Published: Fri Jul 27 06:55:31 KST 2018
12   (Requires Halyard >= 0.41.0)
13 - 1.7.7 (Ozark):
14   Changelog: https://gist.github.com/spinnaker-release/8fa68517da00675a028dbd62c72d6748
15   Published: Fri Jul 27 06:28:03 KST 2018
16   (Requires Halyard >= 1.0.0)
17 - 1.8.4 (Dark):
18   Changelog: https://gist.github.com/spinnaker-release/ad1c07a861e61c1d4777da7b5c6bda24
19   Published: Fri Jul 27 07:04:25 KST 2018
20   (Requires Halyard >= 1.0.0)
21 - 1.8.5 (Dark):
22   Changelog: https://gist.github.com/spinnaker-release/19a850b9081d0fd00a9ac607dfc3d8e0
23   Published: Fri Aug 03 05:40:52 KST 2018
24   (Requires Halyard >= 1.0.0)
테스트에서 최신 버전을 사용하지 않을 이유가 없으므로 1.8.5를 선택하고 버전을 설정한다.
 1$ VERSION=1.8.5
 2$ hal config version edit --version $VERSION
 3+ Get current deployment
 4  Success
 5WARNING: An illegal reflective access operation has occurred
 6WARNING: Illegal reflective access by com.fasterxml.jackson.databind.util.ClassUtil (file:/opt/halyard/lib/jackson-databind-2.8.8.jar) to constructor java.lang.Void()
 7WARNING: Please consider reporting this to the maintainers of com.fasterxml.jackson.databind.util.ClassUtil
 8WARNING: Use --illegal-access=warn to enable warnings of further illegal reflective access operations
 9WARNING: All illegal access operations will be denied in a future release
10+ Edit Spinnaker version
11  Success
12+ Spinnaker has been configured to update/install version "1.8.5".
13  Deploy this version of Spinnaker with `hal deploy apply`.
설정이 끝났으므로 Spinnaker를 배포한다.
 1$ hal deploy apply
 2+ Get current deployment
 3  Success
 4+ Prep deployment
 5  Success
 6Problems in default.security:
 7- WARNING Your UI or API domain does not have override base URLs
 8  set even though your Spinnaker deployment is a Distributed deployment on a
 9  remote cloud provider. As a result, you will need to open SSH tunnels against
10  that deployment to access Spinnaker.
11? We recommend that you instead configure an authentication
12  mechanism (OAuth2, SAML2, or x509) to make it easier to access Spinnaker
13  securely, and then register the intended Domain and IP addresses that your
14  publicly facing services will be using.
15
16+ Preparation complete... deploying Spinnaker
17+ Get current deployment
18  Success
19+ Apply deployment
20  Success
21+ Run `hal deploy connect` to connect to Spinnaker.
설치 중에 인증과 관련해서 안내 메시지가 나오지만 여기서는 일단 설치해서 테스트해보는 것이 목적이므로 그냥 넘어간다. 프로덕션에서 실제 배포 도구로 사용하려면 세세한 설정을 손봐야 할 것 같다.
설치가 끝났으므로 설치한 Spinnaker에 접속해 보자. 그냥은 접속되지 않으므로 다음 명령어로 Kubernetes에 설치한 Spinnaker에 접속할 수 있다. 이 명령어가 로컬에서 Kubernetes 클러스터로 터널링을 해주는 거로 보인다.
1$ hal deploy connect
2+ Get current deployment
3  Success
4+ Connect to Spinnaker deployment.
5  Success
6Forwarding from 127.0.0.1:8084 -> 8084
7Forwarding from [::1]:8084 -> 8084
8Forwarding from 127.0.0.1:9000 -> 9000
9Forwarding from [::1]:9000 -> 9000
9000 포트는 Spinnaker의 관리 UI인 Deck이고 8084 포트는 API 게이트웨이인 gate이다.
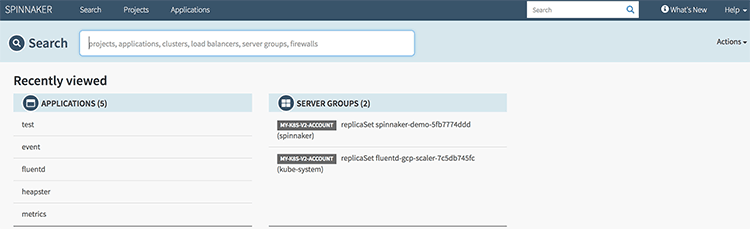
http://localhost:9000/로 접속하면 다음과 같이 Spinnaker 화면을 볼 수 있다.
글이 길어져서 Spinnaker로 배포 설정하는 부분은 좀 더 공부해보고...
Comments