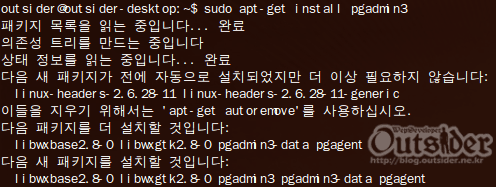
일단 설치부터해야 됩니다. 설치는 PostgreSQL서버와 클라이언트, 그리고 관련 라이브러리를 설치합니다. 여기서 Ubuntu는 9.04이고 PostgreSQL 8.3을 사용합니다.

sudo apt-get install postgresql-8.3 postgresql-client-8.3 postgresql-contrib-8.3
시냅틱을 이용해서 설치할 수도 있지만 apt-get을 이용해서 설치합니다.(apt-get에 자꾸 익숙해져서야 해서...)

sudo apt-get install pgadmin3
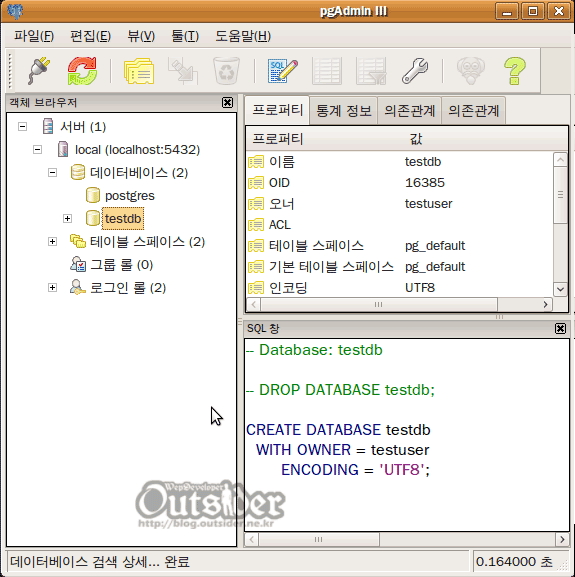
pgadmin3는 Toad나 엔터프라이즈 메니저같은 PostgreSQL GUI클라이언트 툴입니다.
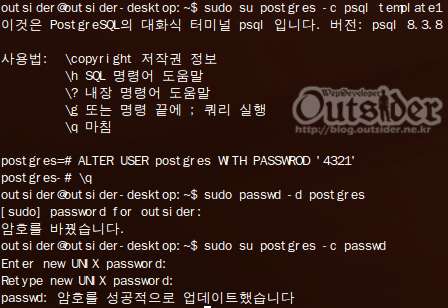
이제 postgres계정의 패스워드를 리셋해 줍니다.

sudo su postgres -c psql template1
postgres=# ALTER USER postgres WITH PASSWORD ‘4321’;
postgres=# \q
sudo passwd -d postgres
sudo su postgres -c passwd
postgres=# ALTER USER postgres WITH PASSWORD ‘4321’;
postgres=# \q
sudo passwd -d postgres
sudo su postgres -c passwd
데이터베이스에서 유저의 패스워드를 교체해주주고 우분투의 postgres유저의 비밀번호를 다시 설정해 줍니다.

sudo -u postgres createuser -D -A -P mynewuser
sudo -u postgres createdb -O mynewuser mydatabase
sudo -u postgres createdb -O mynewuser mydatabase
이제 PostgreSQL에서 사용할 유저를 생성하고 그 유저의 데이터베이스를 생성합니다. 여기서 생성한 유저와 비번을 이용해서 해당 데이터베이스로 pgAdmin을 이용해서 접속하면 아래와 같이 접속할 수 있습니다.

만약 로컬에서 접속하는게 아닌 원격에서 접속해야 한다면 /etc/postgresql/8.2/main/postgresql.conf를 수정해주어야 합니다.
sudo vi /etc/postgresql/8.2/main/postgresql.conf
이 파일에서 아래의 2줄을 밑에처럼 변경해 줍니다.
#listen_addresses = ‘localhost’
#password_encryption = on
listen_addresses = ‘*’
password_encryption = on
#password_encryption = on
listen_addresses = ‘*’
password_encryption = on
설정읠 변경했다면 sudo /etc/init.d/postgresql-8.2 restart 로 PostgreSQL을 재시작해줍니다.


Comments